HOMEMADE: Dan Zai Mein
So now that you know how to make Taiwanese minced meat, here’s a recipe for Dan Zai Mein. Just heat up some noodles (I suggest you buy fresh noodles which can be found in the refrigerated section of an Asian market; do not buy dried noodles!) and the minced meat in separate pots/containers. After the noodles are ready, put them in a bowl and then cook some spinach in the same pot. After the meat is reheated thoroughly, add scoops of the meat and soup (from the meat) in the bowl with noodles. Then add the cooked spinach and cook some shrimp in that same pot if you want as well. After the shrimp is done, add it to the bowl with all the other ingredients. Since the soup from the meat will probably be too salty, you can add some hot water, soup from the noodles (I suggest scooping some out before you cooked the spinach and shrimp in there), or add chicken broth. Chicken broth would probably make it taste much better, but I think hot water is good enough. And then, you know me, I always top it off with some cilantro and green onions.
If you’re looking at the egg (soy egg, lu dan, 滷蛋, whatever you know it as) in the picture and wondering how to make it, it’s quite easy but you’ll have to make it while you are making the minced meat. Just add hard-boiled, already de-shelled eggs in after you add the water and the shallots. After 30 minutes, there will be some flavor on the eggs. Personally, I think this is when the flavor is perfect, but my parents prefer it more saturated with soy sauce. If you want heavily flavored, just cook everything longer. 45-60 minutes should do it.
HOMEMADE: Minced Meat Over Rice 魯肉飯
This is one of my favorite Taiwanese dishes, probably because it’s so simple to make and it’s so tasty. All you need to make this is: a pot, shallots, pork (boneless and with a bit of fat, I use either boneless pork chops or pork belly), soy sauce, sugar (I use brown), oil (I use olive), water, and green onions (this is actually optional, but really who doesn’t like green onions?).
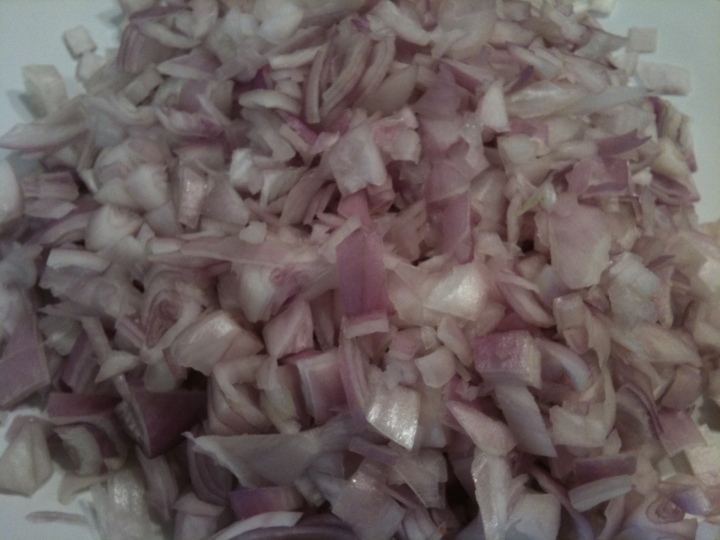
First, take your shallots and dice them up. The shallots really bring the flavor for this dish, so I use a lot of them. (For those of you who don’t know, shallots look like red onions, but smaller.) They don’t have to be cut up into extremely tiny pieces because they are going to be fried later, so they will shrivel up.
Then take your pork and dice them as well. I actually sliced them up a bit too thick in this picture. I prefer them in much smaller pieces usually. (Don’t worry, I didn’t end up using all the fat that you can see in the image. I took out a major portion of fat from them, but it’s really up to you what you want to do. You have to keep some of it in though because it makes it taste better.)
Then you get the pot (do NOT use a pan, the oil will get all over the place if you do) and add a lot of oil– enough oil to cover ALL off your shallots. Then when it’s hot enough, add all your shallots. Leave it on high heat and stir regularly (but not so often that your arm gets tired) until they brown and crisp. Then take out all the shallots and let them sit on a paper towel to absorb some of the oil.
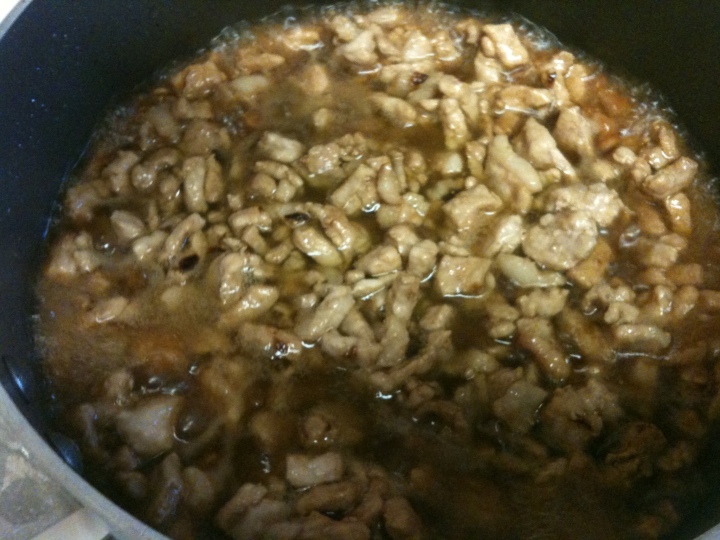
Take out a good amount of oil from the pot (which I forgot to do, so the picture is a bit off) and then add the pork and soy sauce. Stir until the meat is no longer pink. (Feel free to add some black or white pepper if you want.) You can add a fair amount of soy sauce since you’ll be adding water and sugar later. (If you forget to take out the oil, it’s fine. You can try to take some out after the meat has been fully cooked, but if you forget that too, your dish will just be a bit oilier than normal.)
Then add some water; I add just enough water so that the meat is covered. Put all the shallots in and add sugar to taste. Make sure you mix it all so the flavors seep through. After it begins to boil, put it on a low/medium heat for 30-45 minutes. You can still play with the flavors after this.
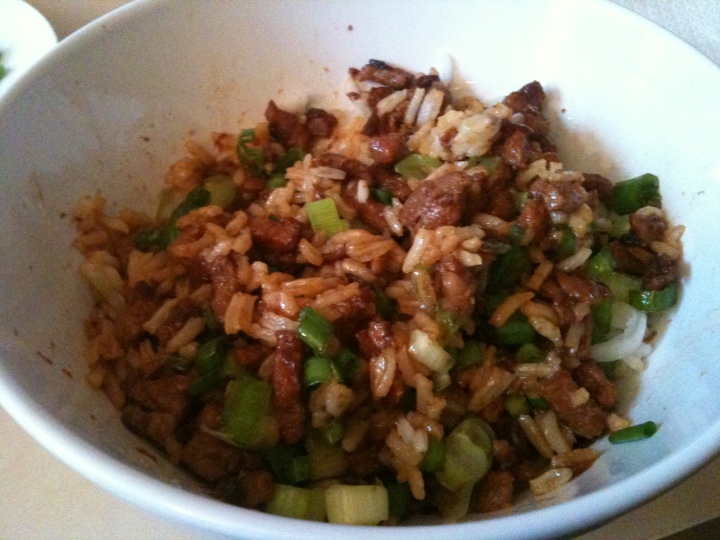
And ta-da! It’s done. Get some rice, scoop some meat on top, and add a bit of the soup. Top it off with whatever you like– green onions, cilantro, etc. I like it with just green onions; cilantro tastes a bit weird with this in my opinion. And then mix and eat!
Let me know if you make it and if you like it. It may not be the traditional recipe in Taiwan, but i think it tastes quite right. Plus, I’ve served it to a number of people who are Taiwanese or have lived in Taiwan for a while and they liked it…. at least so they said!
HOMEMADE: Chicken Enchiladas with Pumpkin Puree
Do you see that dish in the center of the photo? The one topped with the cilantro and scallions? That’s my chicken enchiladas in pumpkin purée. It came out pretty well I think. The only thing I regret is adding five jalapeños! I found this from a cookbook, but altered it a bit for my own tastebuds. Here’s the recipe in case you want to try it yourself:
You will need: a rotisserie chicken (I suggest you get the original flavor and not lemon or rosemary flavors), green onions, garlic, salt, pepper, corn tortillas, jalapeños, water, a 29 oz can of pumpkin puree, and cheese (I used a bag of shredded cheese that was a “Mexican blend” of jack, yellow cheddar, and white cheddar). This recipe is about enough to create 12 enchiladas, depending on how big you want them, which feeds about 6-8 people.
First, preheat the oven to 425 degrees. Shred the chicken and make sure to take off the skin and throw out the bones. Then mix it with some sliced green onions, salt, and pepper and set it aside. Next, take the pumpkin purée, garlic (I used about 6 cloves), jalapeños, water (take the pumpkin purée can and fill it about halfway), salt, and pepper and mix in a blender until there are no lumps. Then take a bit less than half of this mix and spread it on the bottom of your baking pan. Make sure you cover every corner. Then take your corn tortillas, fill it with the chicken mixture (and a bit more cheese if you’d like), roll it, and put it in the tray with the flaps facing down into the pumpkin mix. After you finishing rolling all of them, add the rest of your pumpkin mix and top it off with some cheese. Stick it in the oven for about 30 minutes and garnish it with some cut green onions and cilantro when it’s done if you’d like.
Ta-da! There you have it. Let me know if you like it.
Beef Noodle Soup
Taiwanese folks are so proud of their beef noodle soup (牛肉麵) there’s a competition in Taipei over who makes the best one. I think my mom’s beef noodle soup is off the charts. It’s been over six months since I last had it, so I decided to make it tonight for dinner and share the recipe with you folks.
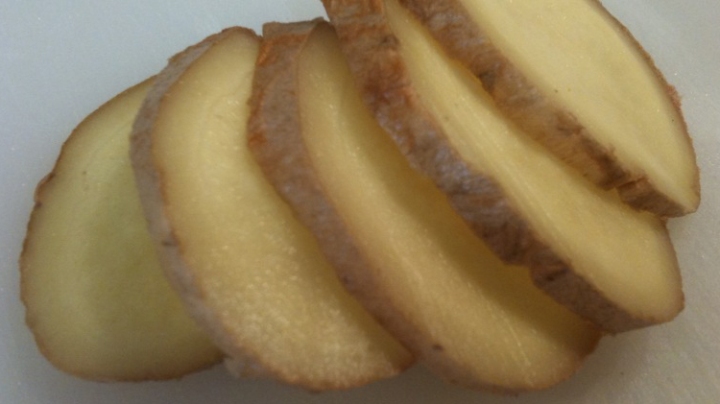
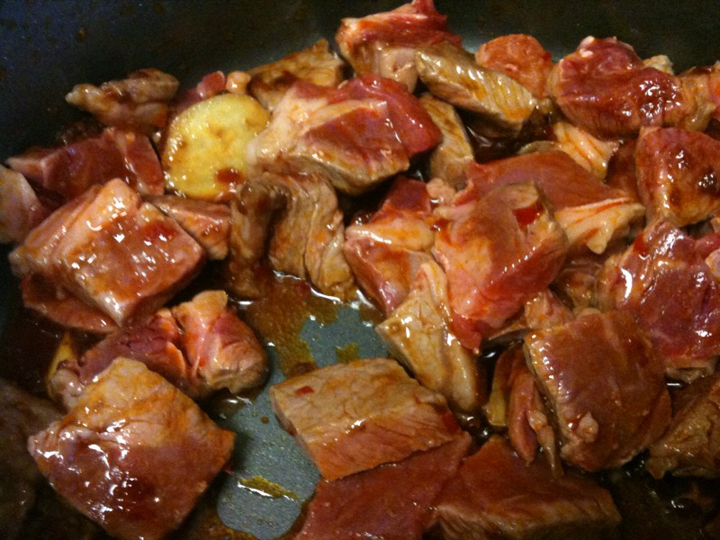
First off, you need beef (I use ribeye steak), green onion, anise, black pepper balls, salt, ginger, garlic, chili bean sauce, olive oil, water, and rice wine… which I was out of, so I used rum in this recipe. Slice 4 or 5 pieces of ginger, peel 4 or 5 cloves of garlic, tie one whole green onion, and dice the beef into cubes.
Heat some olive oil in a big pot and then add the chili bean sauce. This is not the chili bean sauce that my mom uses back in LA, but it was the best one we could find here in New York. The chili bean sauce makes a HUGE difference in this recipe. If it’s not a good sauce, this is not going to be a good recipe. I’d say this one is alright, whatever my mom gets back at home though is the best. (I’ll try to find out what it is for you the next time I go home… if I remember.) I used 2 to 3 tablespoons of this sauce and it still wasn’t spicy at the end, but it does the trick.
Stir the chili bean sauce until it becomes really fragrant and looks grainy.
Then add in the garlic and ginger pieces. Stir some more.
After you really begin to smell that, add in your beef and stir until all the beef edges are cooked.
Add a bit of rice wine to the edges of the pot. (Or in this case, rum!) Why the edges? Don’t ask me, that’s what my mom does! You only need a bit, but if you are like me and dump in too much liquor, all you have to do is cook it for longer.
Then add in as much water as you want, 1 or 2 anises, 8 to 10 black pepper balls, and your green onion stick.
Let it all come to a boil and then put it on medium hot for 30 minutes. If you use tougher pieces of beef or bigger chunks of beef, you have to add more time for this recipe. The longer you cook it, the softer/more tender the beef will get.
Salt to taste and remove the wilted green onion. Then add noodles, cilantro, veggies, whatever you want… Ta da! It’s done.
Homemade Chinese Borscht
You are probably thinking what the heck is she talking about or man, that does not look appealing, right? Well, pictured above is one of my favorite soups, 蘿宋湯 (luo song tang) aka vegetable soup aka Chinese style borscht. My mom has made this for me ever since I could rememer. When I moved to Taiwan a few years ago, I decided to finally get the recipe from her. It’s surpisingly easy to make and extremely healthy, so I thought I would share.
You can pretty much use whatever vegetables you like– mushrooms, celery, beets, etc., but I like to keep it simple. For me, the only ingredients are: beef (I use ribeye steak), cabbage, yellow onion, baby carrots, potatoes, tomatoes, garlic, ginger, green onion, pepper, salt, vinegar, and water. As for the quantity of each ingredient, it’s pretty much up to your tastebuds. I put a lot of meat in mine as well as tomatoes (my favorite part!) while I use just one potato. Do what you want.
Now for the preparation… Dice the beef, onion, and cabbage into cubes and slice the ginger (you only need about 4 thin slices), carrots, and tomatoes (tomatoes slices should look like wedges). Peel the garlic; I usually use 3 to 4 cloves. And cut the green onion stalk into three pieces. Peel the potato, cut into cubes, and place in a bowl of cold water– this prevents it from crumbling in the soup.
Now we are ready to cook. Boil a pot of water, add the beef and splashes of vinegar. The vinegar gets rid of the meaty taste so it does not overpower the rest of the soup. When it comes to a boil again, drain the meat and rinse with cold water. Now get a big pot and add all the vegetables (except the potato) and the beef. Fill the pot with water so it barely covers all our ingredients. Bring it to a boil on high, then reduce the heat to medium high and add your drained potato cubes. Let it cook for 30 to 40 minutes and add salt and pepper to taste. Early warning, you need to add a good amount of salt. Ta-da! We are finished!
If you want it more flavorful, you can use chicken stock instead of just water. If you want it more colorful, add tomato purme. I don’t do any of that because I think it tastes great as is, plus it would ruin the healthy quality of this soup!
Anyway, there we go. Let me know if you attempt it.
Steamed Spareribs in Black Bean Sauce
One of the best dishes my mom makes is also one of my favorite dishes when I get dim sum– steamed spareribs in black bean sauce. Everyone I know loves this dish, so I thought I would share this recipe. It’s surprisingly simple; you can easily make this at home if you follow my steps.
First, you have to buy the spareribs. I highly recommend going to Chinatown or 99 Ranch, if you’re lucky enough to have one near you, to buy them. The ones pictured here were bought from Fresh Direct and were a bit too big for my liking. Plus, when you buy them at a Chinese place, they’ll cut them up into pieces for you. I had to do that myself with the Fresh Direct ones. It’s not that big of a deal, but why add the extra hassle if you don’t need to, right? Other ingredients needed for this recipe are: dry black beans (which you can also buy in any Chinese supermarket), jalapenos, vinegar, salt, pepper, and cornstarch.
Anyway, now that your spareribs are cut into pieces (and hopefully thawed), add some salt and pepper and mix. Then add some cornstarch to the meat and mix some more.
Let the meat sit while you boil a big pot of water. Once the water begins to boil, add the meat and then some vinegar. I add a good hearty amount, probably 2-3 seconds of pouring. Make sure you stir occasionally so that the meat doesn’t stick to the bottom of the pot. When it begins to boil again, pour the water out and rinse the meat in cold water. You should lightly scrub the meat with your fingers, there might be some small chunks of blood. (Gross I know, but that’s what happens!)
Then take the dry black beans (if you live near me, I can give you some as I have a LOT in my fridge!) and sliced jalapenos and mix them into the spareribs. Be careful of the jalapenos if you can’t handle the spice! As for the black beans, the more you add, the saltier it gets. If they are pretty big pieces of spareribs like the ones pictured above, one black bean per sparerib would probably be good. If they are small pieces like the ones you get at dim sum, maybe one black bean per every 3-4 pieces would be good. I just kind of eyeball it as I do with most of my cooking.
Now, it’s ready to be steamed and eaten! I steam the spareribs by putting a small plate on the bottom of a big pot, filling the pot with about an inch or so of water, putting the bowl filled with spareribs inside the pot on top of the plate, and then covering the pot. (Let me know if that doesn’t make sense.) I start by putting the pot on high heat until it boils, then I move it to small to medium heat for 45-60 minutes.
Ta-da! It’s ready to eat!
Homemade kimchi pork dumplings.
I never cook following a recipe. I never measure. I add a random amount of what I’m supposed to, leave out the things I don’t like, and add tons of the stuff I love. I think this is how cooking should be. Made from the heart and not from a cup.
I made these kimchi pork dumplings because I missed being able to get them on my way to work in Taiwan. Man, were they delicious. I could easily devour ten in a matter of seconds right before I hurriedly ran up the stairs to teach.
For my own concoction, I got a pound of ground pork which I mixed with some water. I found that the pork I buy from fresh direct mixes the best. I stir the meat and water in one direction, usually counter clockwise for me. It doesn’t matter which direction you do it– counter clockwise or clockwise, it just has to be the same direction the whole way through to keep the water soaked in. I add enough water to make the pork a lumpy consistency rather than chunky, but mindful that the kimchi will add even more water to the mixture. After that, I mix in some soy sauce until the pork turns a light brown. Then comes a bit of black pepper and some salt. I add a ton of chopped green onions; one of my favorite things on this planet. Then I add chopped kimchi and the juice that comes with it. Stir in a bit of brown sugar and it’s ready to be folded.
Folding dumplings isn’t that hard. Just buy already made gyoza (Japanese for dumplings) skin from an Asian market, put a tiny amount of your mixture in the middle (you can gradually add more once you become more skilled at folding), add a dab of water along the edges, and then fold the skin to look like a semi-circle. Press tightly to make sure there are no gaps and you are finished.
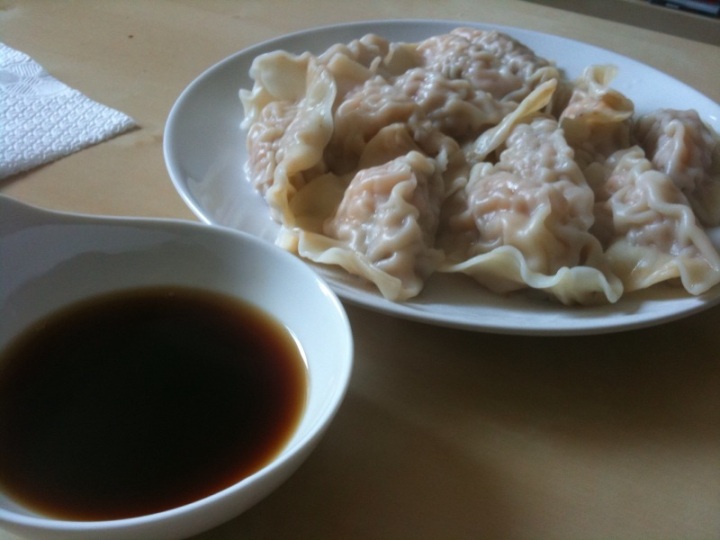
Pictured above are boiled dumplings, but they taste even better fried (doesn’t everything?). Both methods are simple, but boiling is, of course, healthier. Just put a pot of water on your stove, when it begins to boil add as many dumplings as you want, when it boils again add a cup of cold water, and when it boils again turn off the heat and serve it with some dumpling sauce or a mix of soy sauce and vinegar. If you want to fry them, you need a pan that you can cover completely with a lid. Add some oil to the pan, wait until it gets a bit hot, add as many dumplings as you want (but make sure you space them out because they will expand), wait until 1/3 of a dumpling becomes translucent, add water to the pan (enough to cover 1/3 of a dumpling), cover the pan with a lid, wait 8 to 10 minutes, and it’s ready to eat! If there’s still water in the pan after the 8 to 10 minutes are up, just lift the cover and let the water evaporate.
Ta-da! We’re done!
Welcome to Asian cooking 101… Just kidding! Haha.










leave a comment